To start using filters on your website, follow these steps:
1) Create a Filter Set
Navigate to Filters and click Add New. This will create a new Filter Set.
In the Filter Set, you need to specify the next three main parameters:
- Post type to filter – Select which post type you want to filter. This can include products (WooCommerce), posts (WordPress), or any other custom post types on your site.
- Where to filter – Select the page where this Filter Set will be applied. For example:
- WooCommerce Shop page: choose Common WordPress pages + Shop
- Product category page: choose Product category + name of the category
- Singular page: choose Pages + name of the page
- What to filter – Select the post lists you want to filter. You only need to choose the one that corresponds to the posts you want to filter on the page. If the page has three or more post lists, you may need to test to ensure you select the correct one.
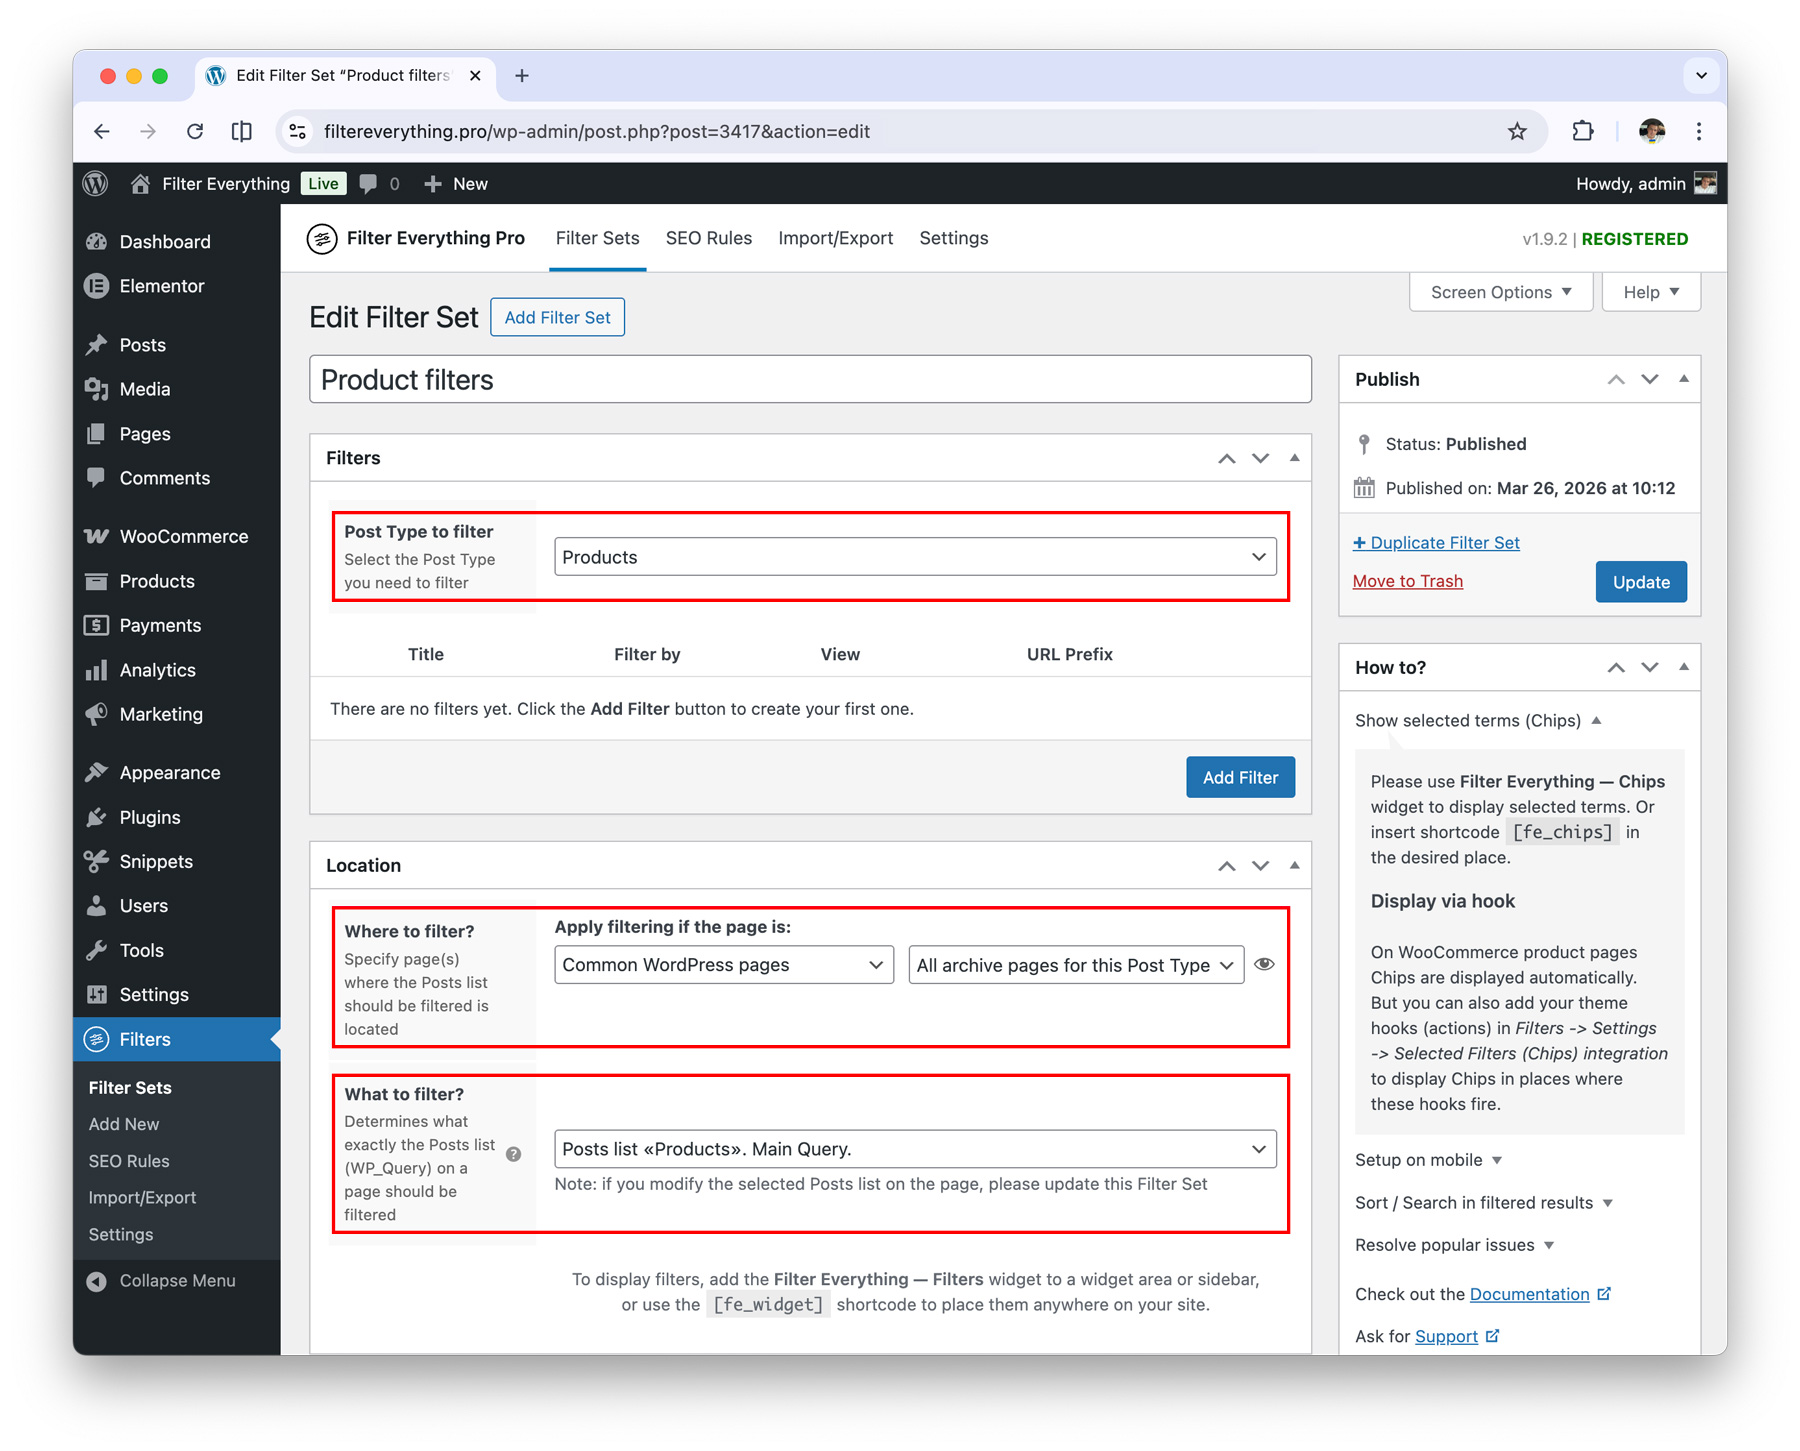
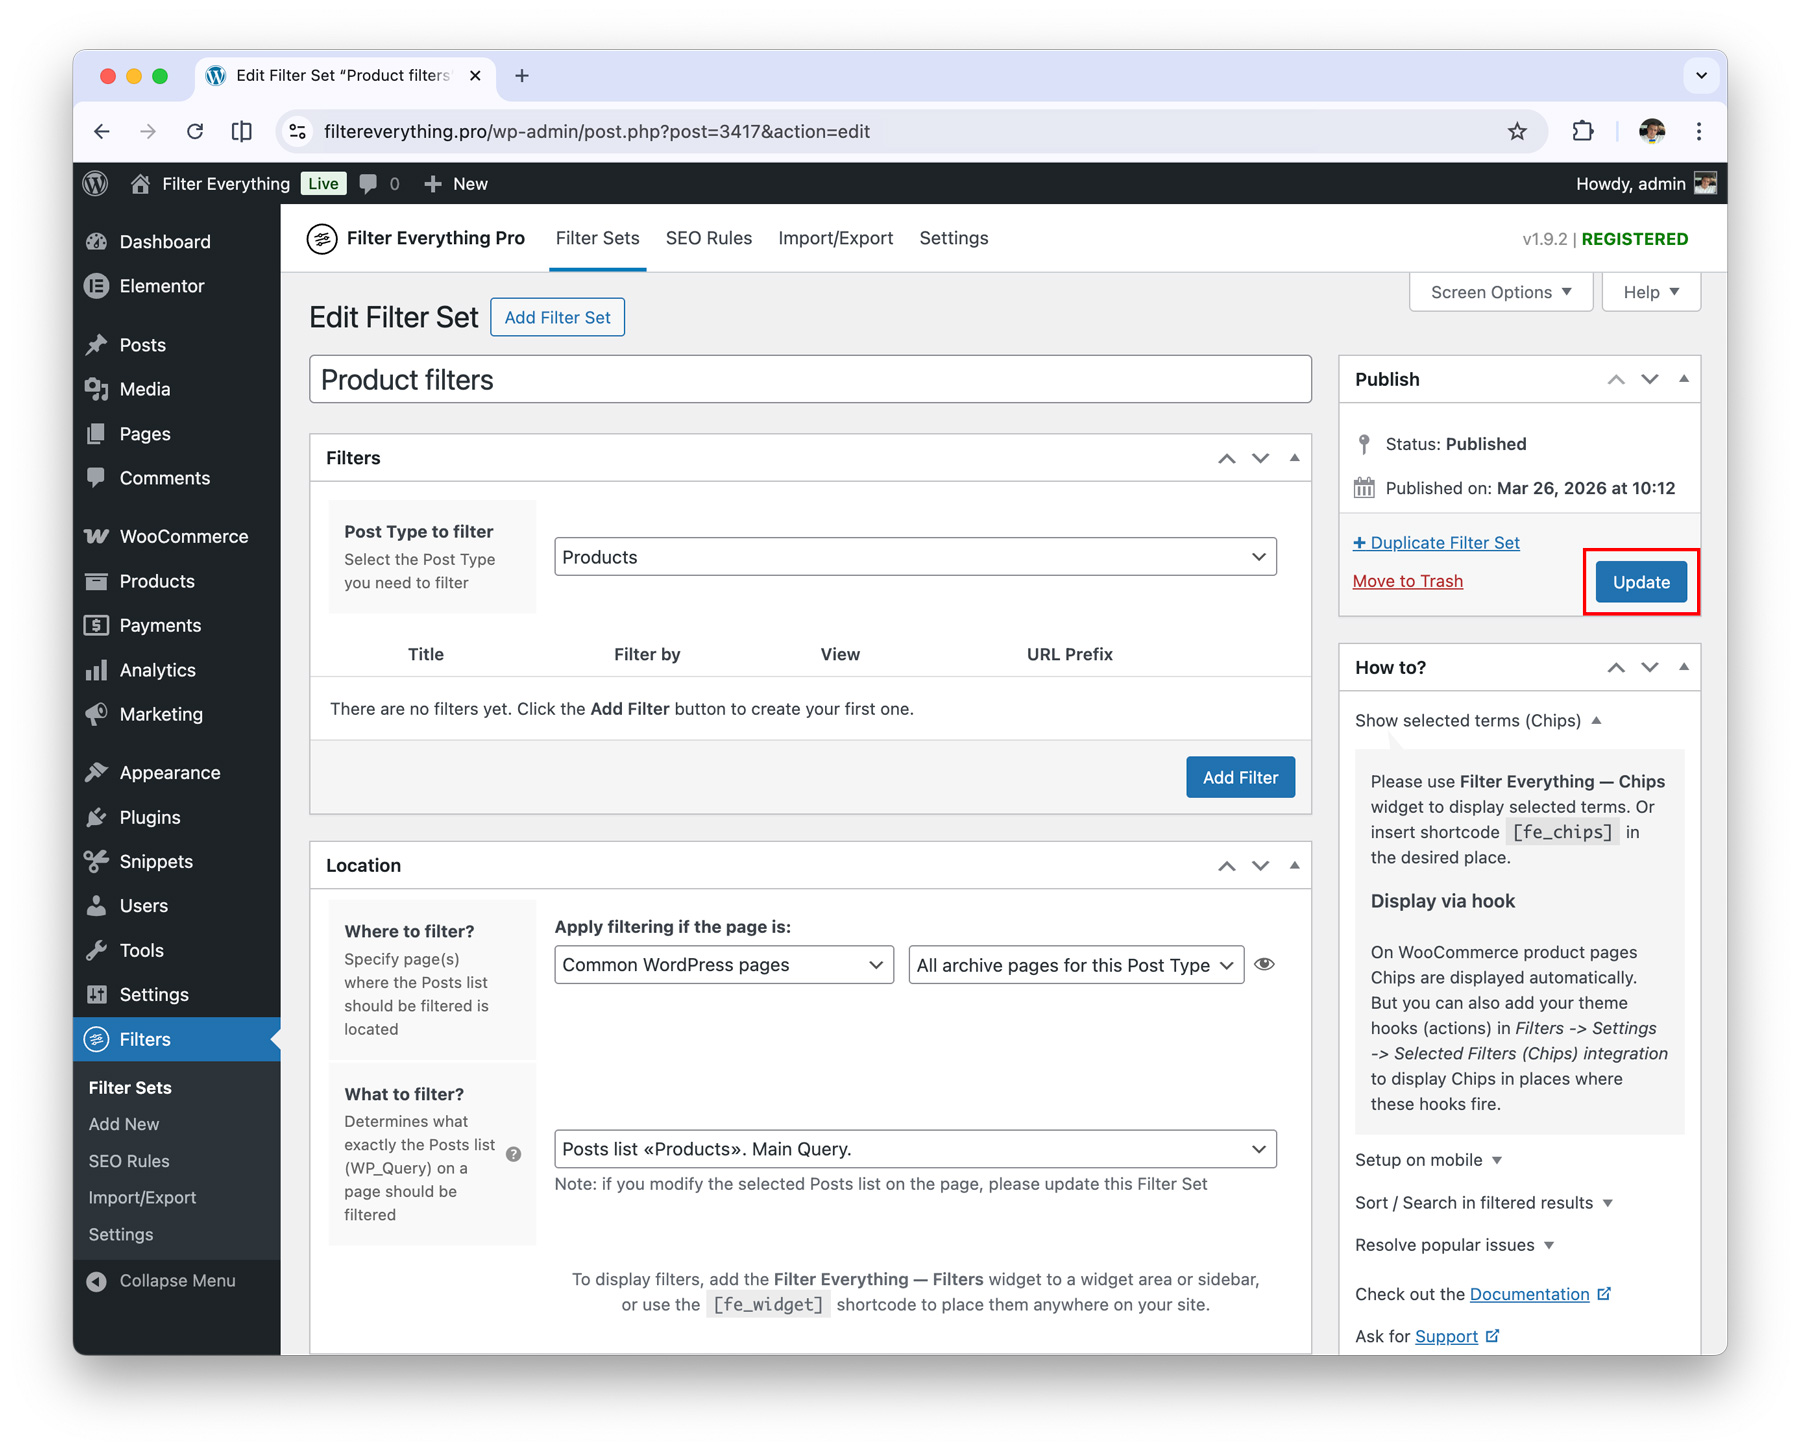
After specifying all three parameters, all you need to do is click the Save/Update button.
2) Create a Filter
Filters can only be created within a Filter Set. Simply click Add Filter and fill in the following fields:

- Filter by – Select the parameter you want to create a filter from. It can be any attribute, such as color, size, or category (taxonomy), as well as a custom field, such as date, number, text, checkbox, radio button, select dropdown, or other field types created via ACF or any other plugin.
- Meta key – This appears only when creating a filter from a custom field. Select or enter the meta key for the desired field. For example, in WooCommerce, the price field uses the meta key
_price. - Filter Title – An optional parameter that defines the title of the filter, which will be displayed in the Filters Widget.
- Prefix for URL – Define a prefix for your filter, similar to slugs for pages or categories. For example, if you define
brandas a prefix, filtered URLs may look like/brand-apple/, wherebrandis the filter prefix andappleis the selected filter term. Similarly, usingcoloras a prefix would produce URLs like/color-red/, wherecoloris the prefix andredis the filter term.
The prefix must be unique and not conflict with other slugs on the site or system-reserved slugs. If it conflicts with existing slugs, the filter may not work or may cause a 404 error.

After adding the required filters, click the Save/Update button to save all created filters.
Any changes made in the Filter Set or Filters must be saved by clicking Update to ensure that all changes are applied and not lost.
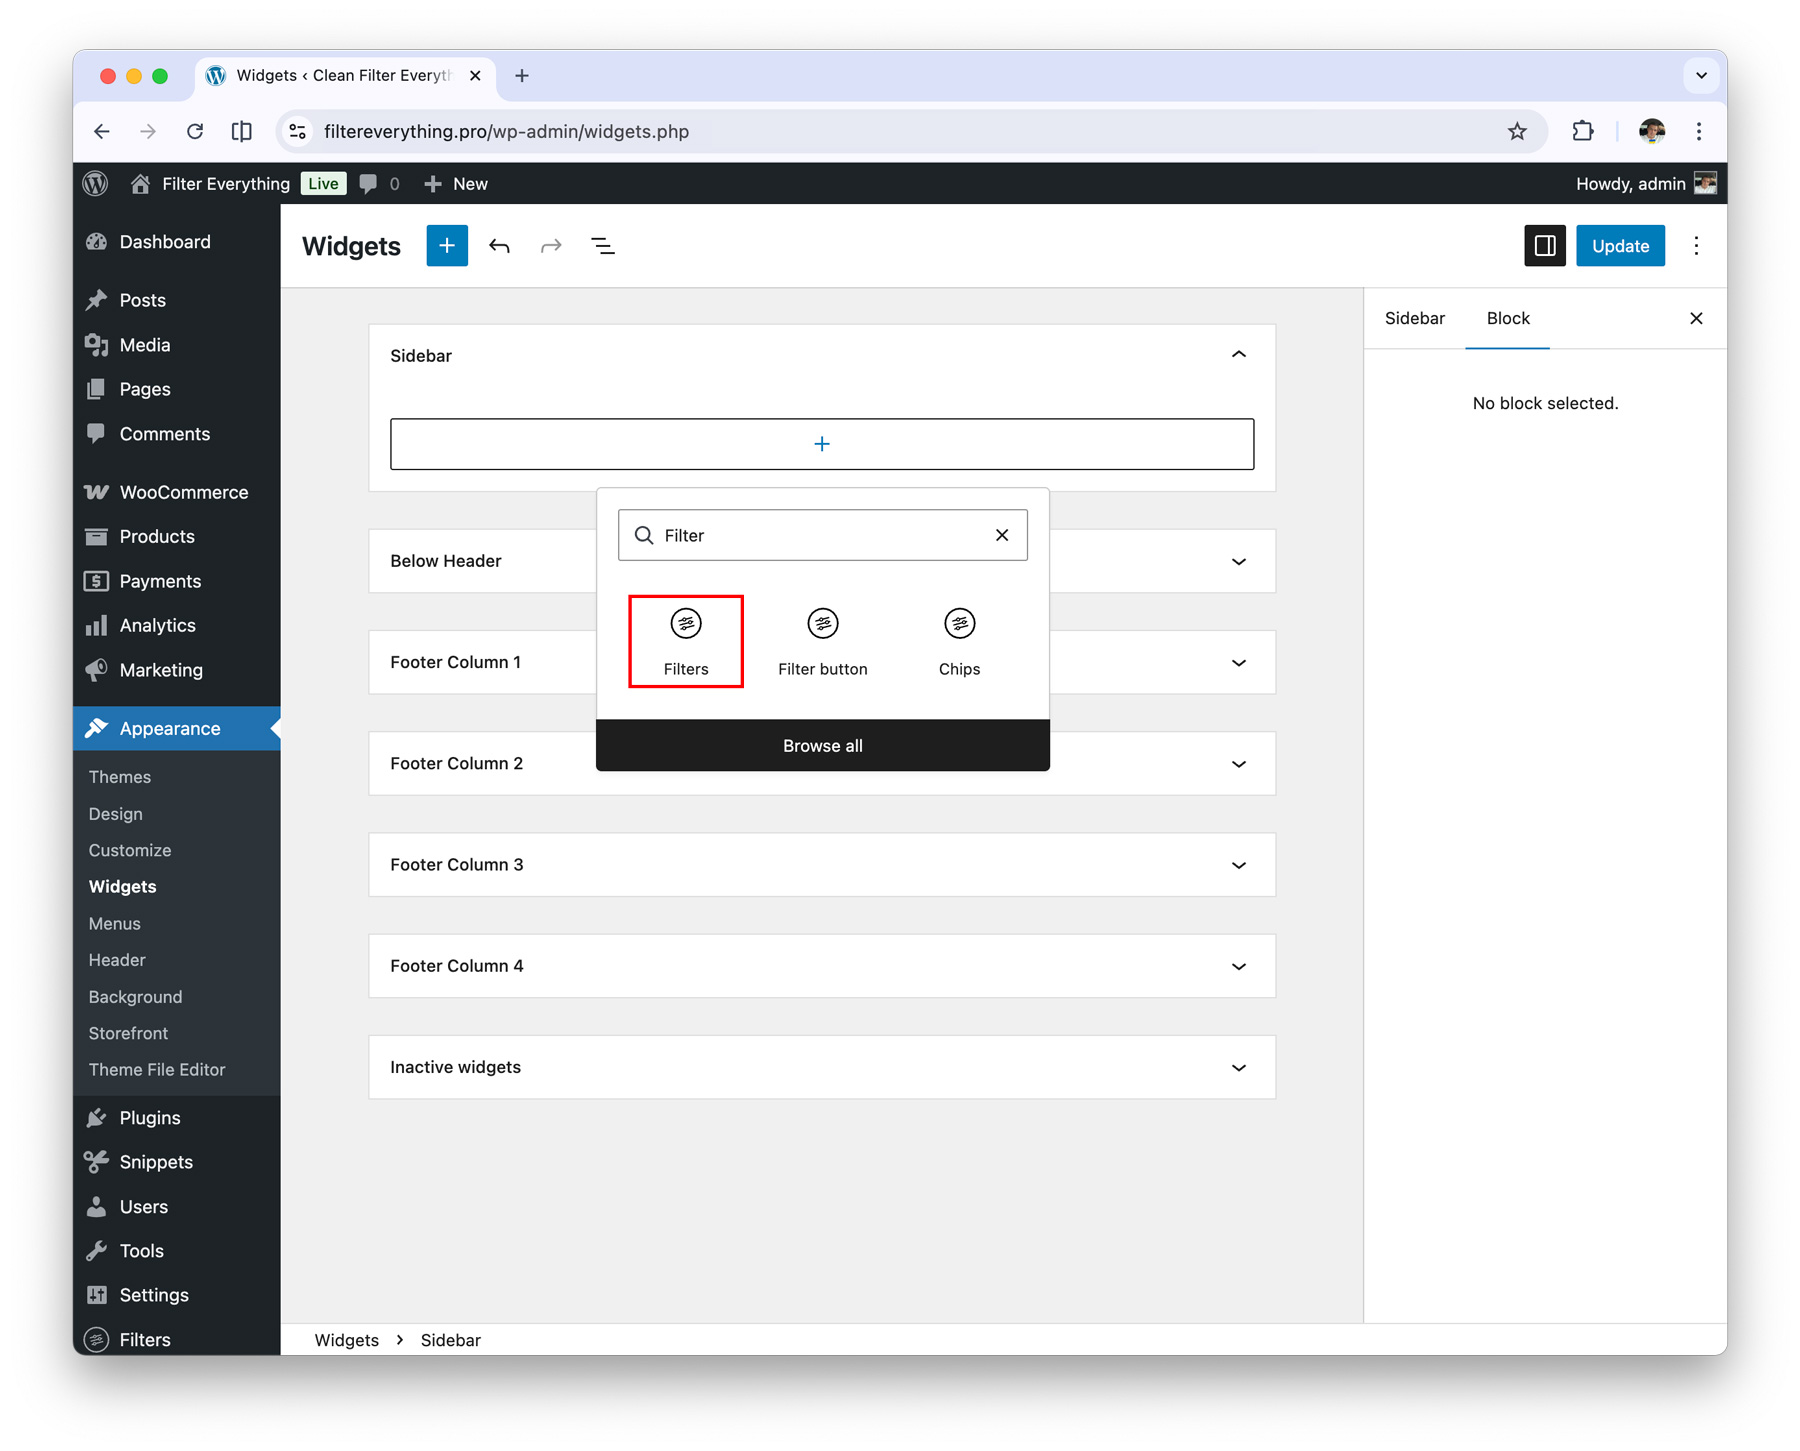
3) Add Filter Widgets/Shortcode to the page
Displaying filters is just as easy. You simply need to add either a Filter Widget or a Shortcode to the page specified in the Filter Set settings (Where to filter).
- If the required page has a sidebar (widget area), you can simply add a Filters widget to the sidebar to display the filters.

- If the theme you are using does not support a widget area or has an HTML sidebar without widgets, you can simply add the shortcode
[fe_widget]to display the filters.
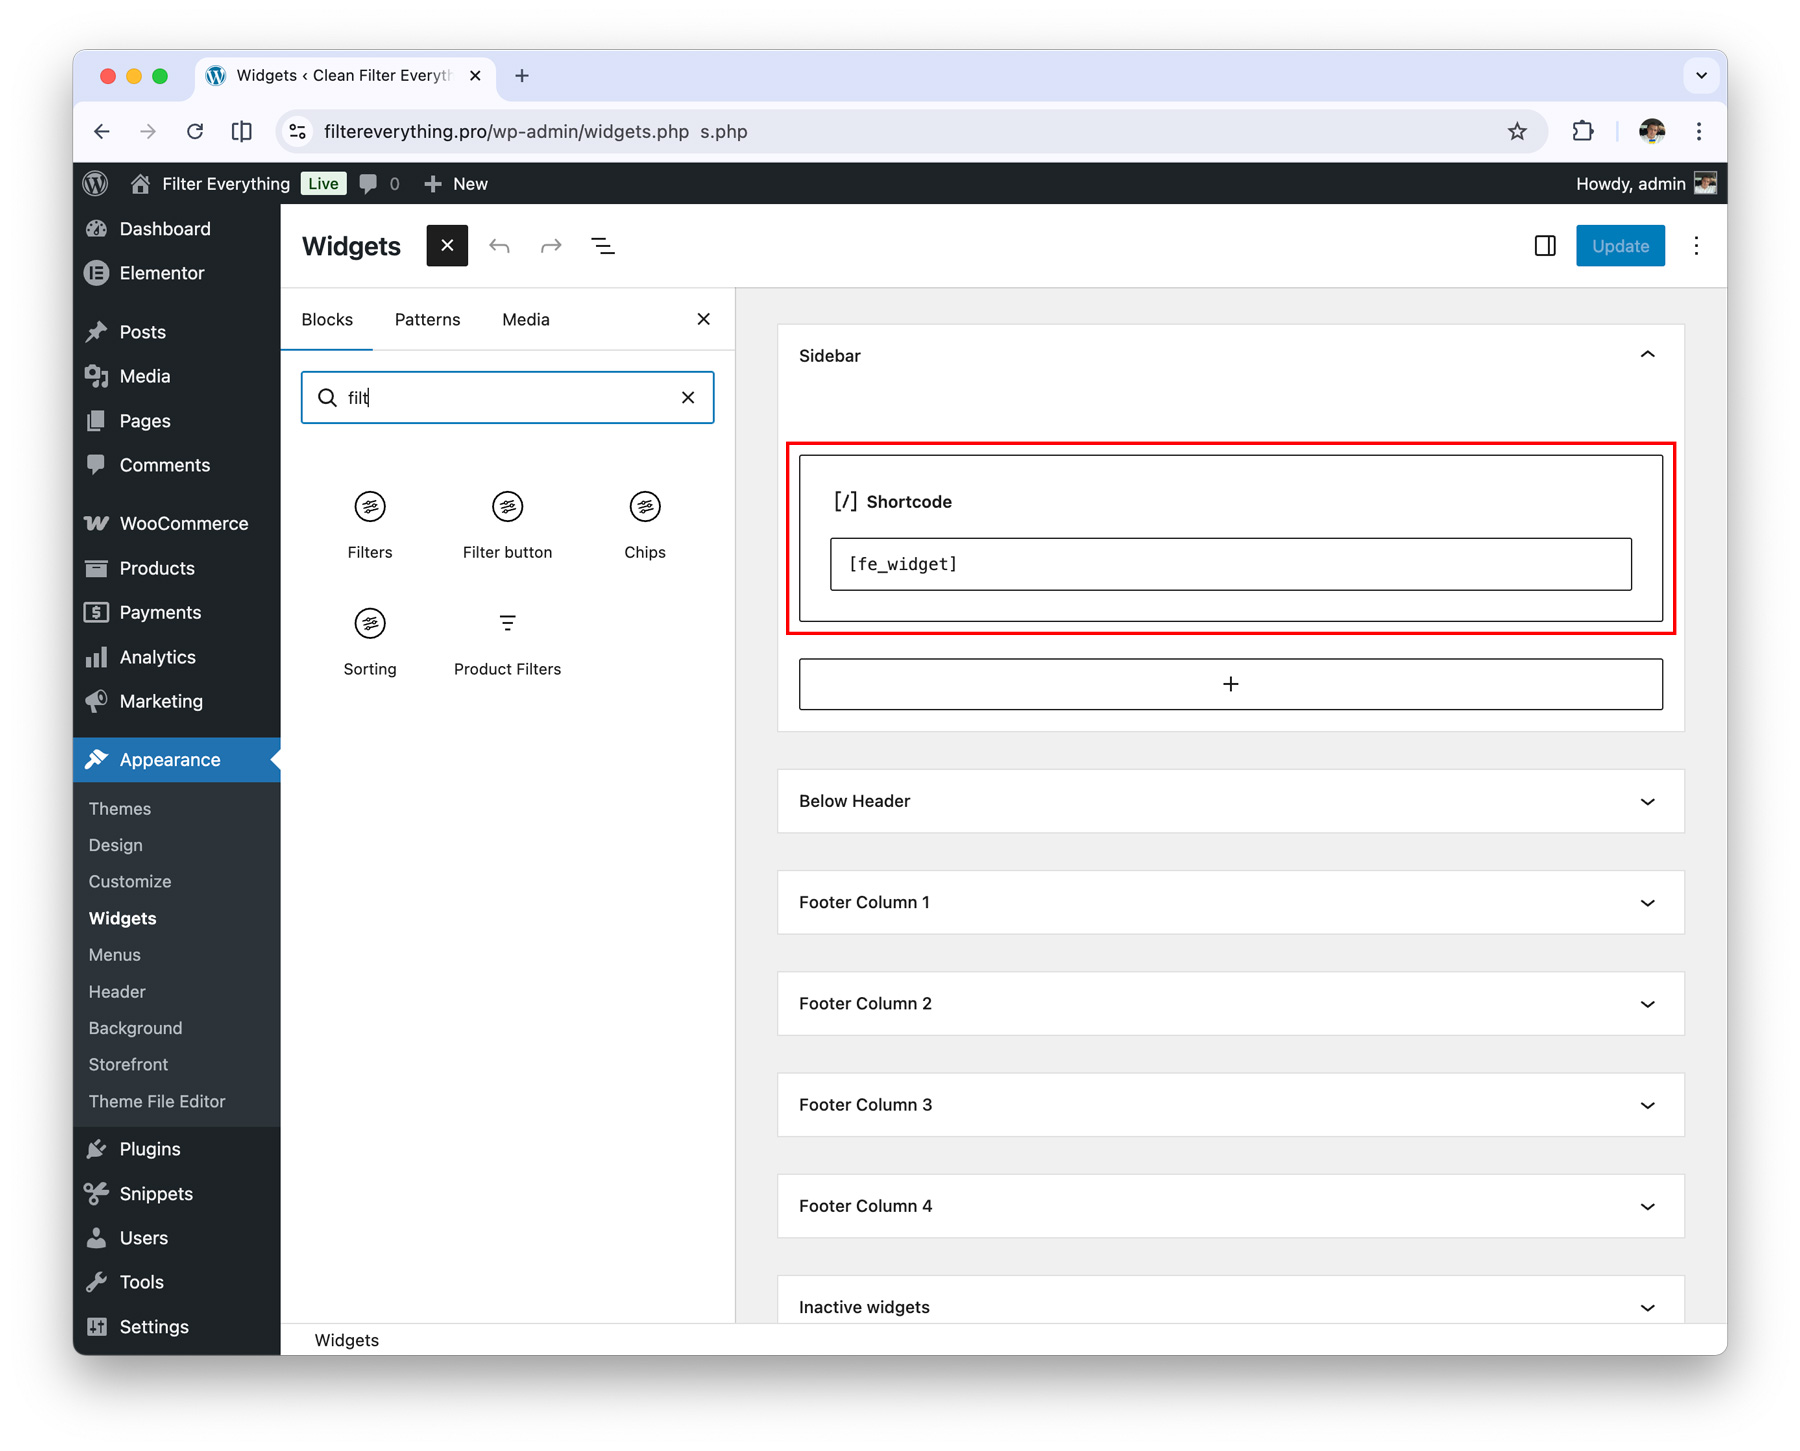
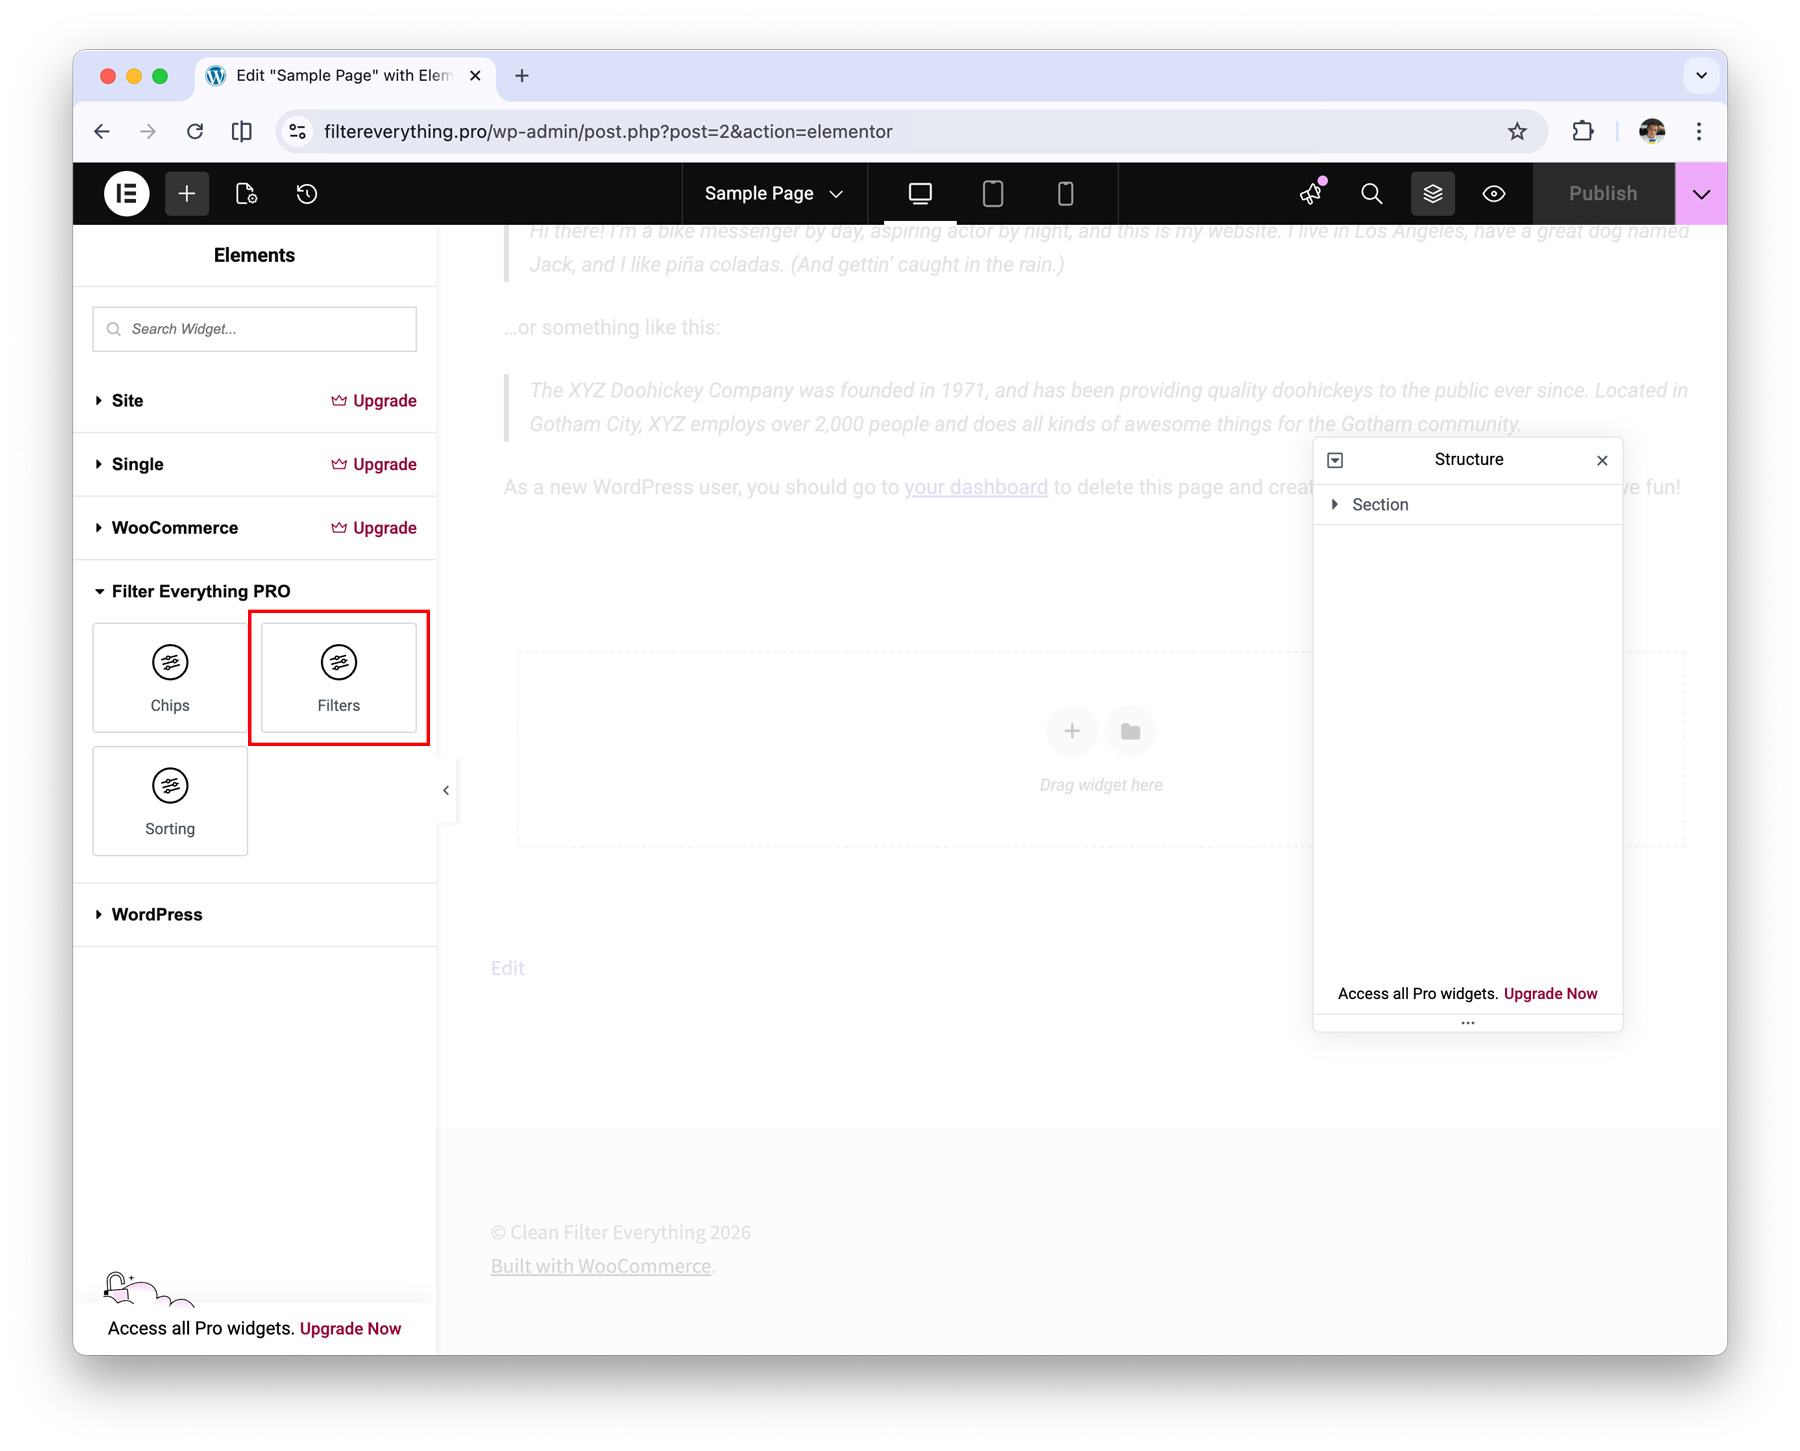
- If you are using a page builder on the required page, such as Gutenberg, Elementor, Divi, Breakdance, or others, you can add the filters using the page builder’s integrated widgets.

After completing all the steps, the filters should appear on your page and be ready to filter your posts.
Example for WooCommerce products
- Create a Filter Set (Filters > Add New)
- In Post Type to filter, choose Products
- In Where to filter?, choose Common WordPress pages + Shop (default shop page)
- In What to filter?, choose the list of products to filter
- Click Add Filter to create a new filter
- Filter by – choose Product Category
- Prefix for URL –
product-cat
- Click Update/Create to save all changes
- On the shop page, add the Filter Everything – Filters widget or use the
[fe_widget]shortcode
Example for WordPress posts
- Create a Filter Set (Filters > Add New)
- In Post Type to filter, choose Posts
- In Where to filter?, choose Common WordPress pages + Blog (default posts page)
- In What to filter?, choose the list of posts to filter
- Click Add Filter to create a new filter
- Filter by – choose Category
- Prefix for URL –
category
- Click Update/Create to save all changes
- On the Blog page, add the Filter Everything – Filters widget or use the
[fe_widget]shortcode
Completed all the steps but the filters still don’t appear on the page? Please check the “Common Issues” section for potential problems that may affect filter display on your site.